 Save to Pinterest
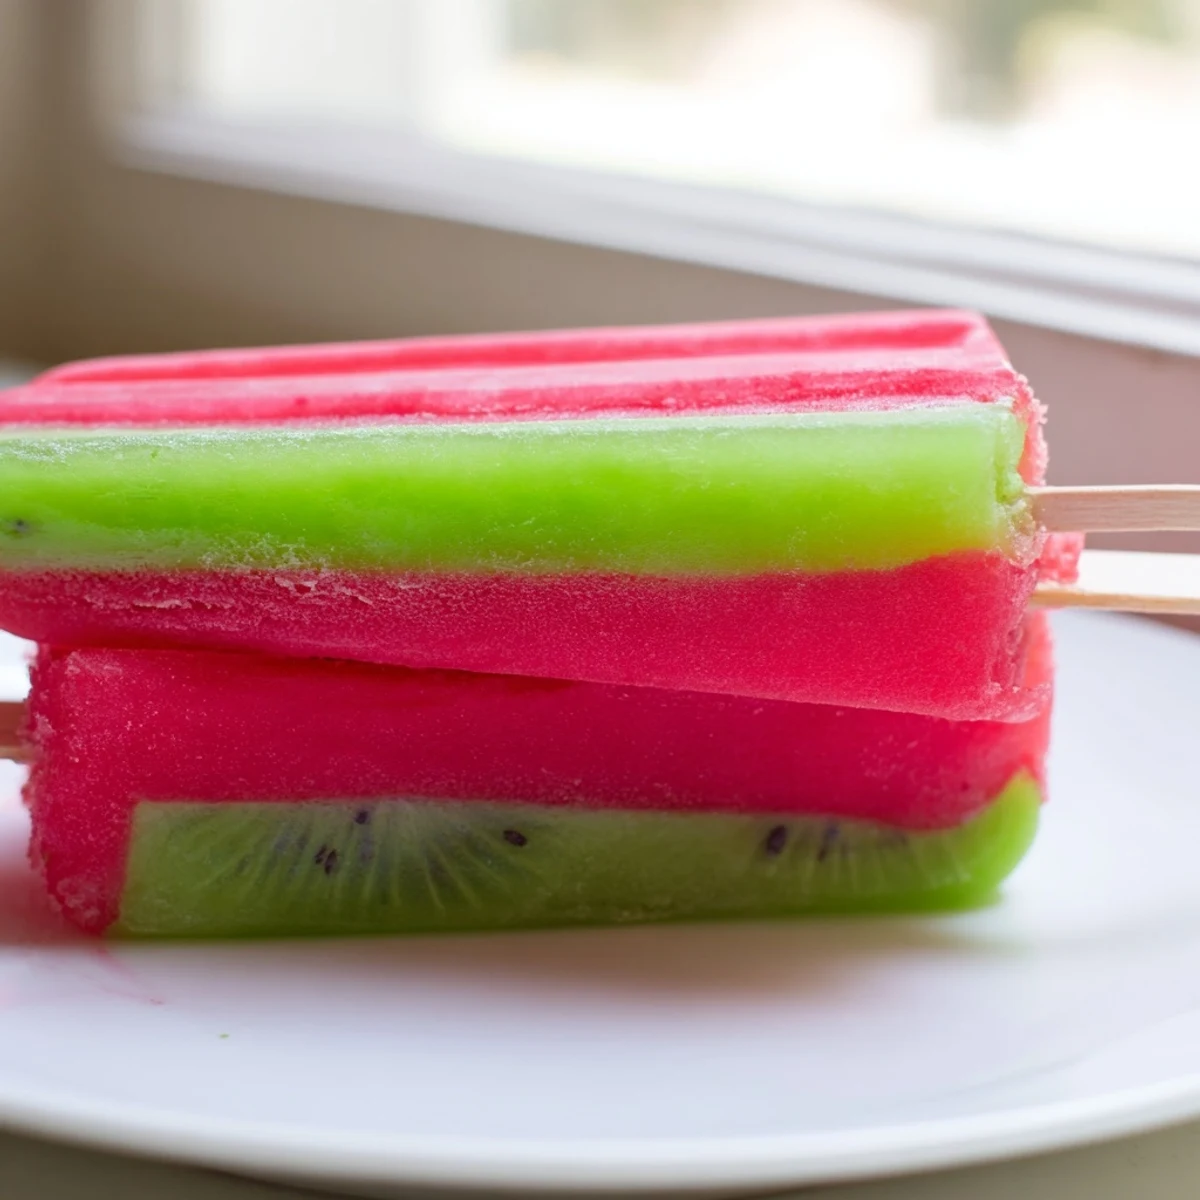
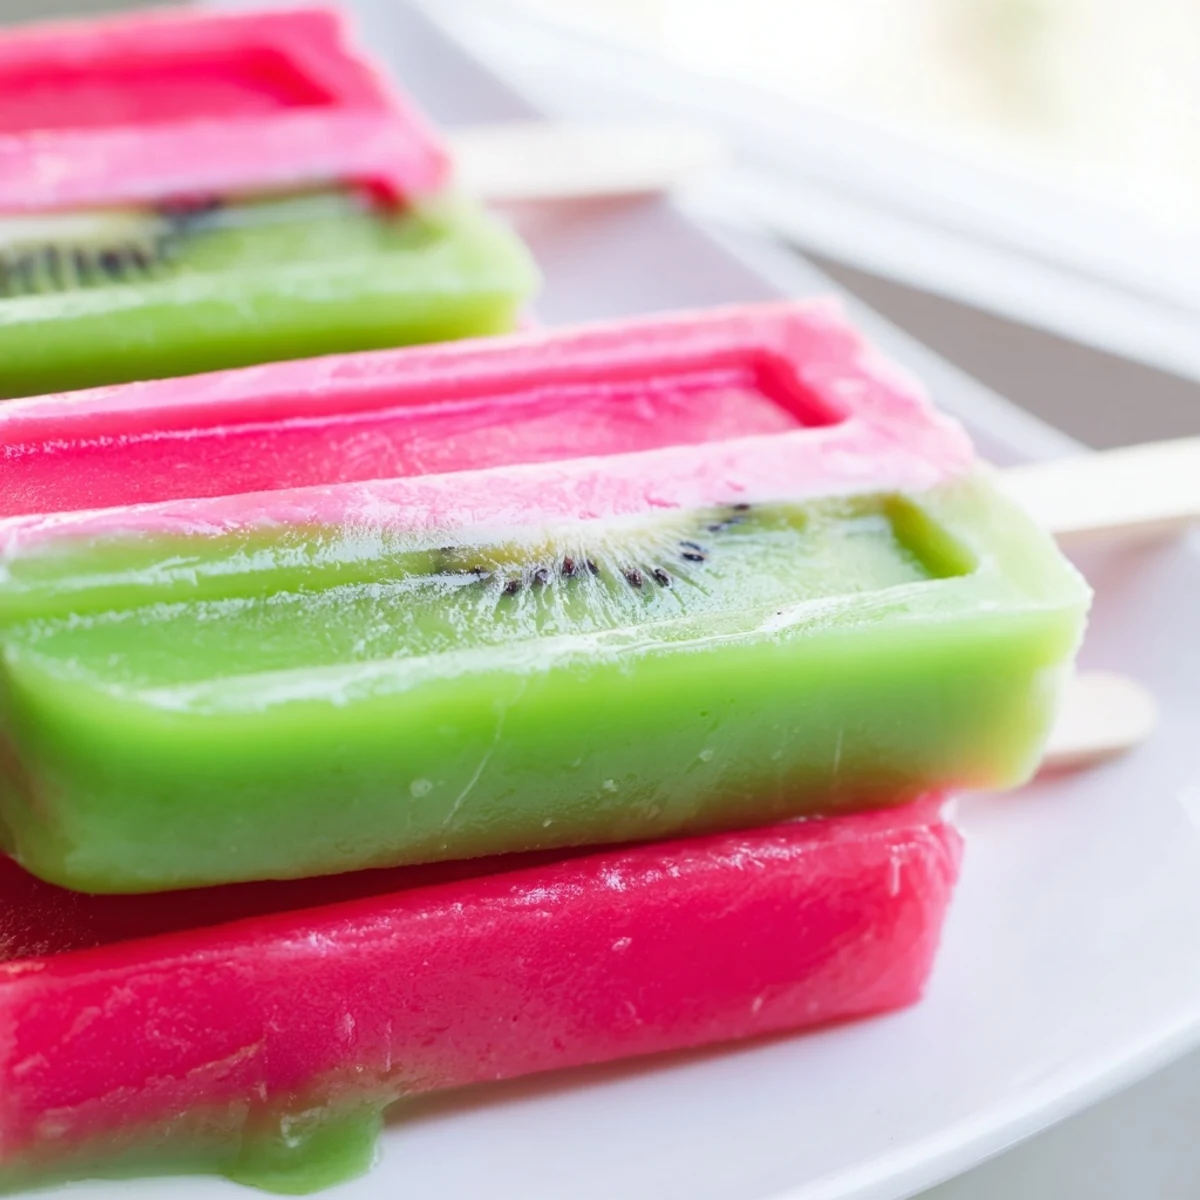
 Create stunning two-layer frozen pops with sweet watermelon and tangy kiwi. These colorful treats are naturally sweetened, vegan-friendly, and perfect for cooling down on hot summer days. The preparation involves blending fresh fruits, freezing in layers for that beautiful striped effect, and results in a refreshing dessert that both kids and adults will adore.
July in my apartment used to mean standing in front of the open freezer door, eating ice chips off the walls like some kind of heat deranged gremlin. Then I discovered that my blender and a handful of summer fruit could produce something that actually made the heat bearable, and my freezer door has never been the same since. These watermelon kiwi pops are the result of one particularly desperate afternoon when the temperature hit 103 and I refused to turn on the oven.
My neighbor Rosa walked in last August while I was unmolding a batch and stood speechless for a full ten seconds before grabbing three in a row. She now texts me every week asking if the popsicles are ready, which I suppose is the price of sharing good recipes with people who live thirty feet away.
Ingredients
- Seedless watermelon (3 cups cubed): Pick a watermelon that feels heavy for its size and has a creamy yellow spot on the bottom, which tells you it ripened in the field instead of a warehouse.
- Fresh lime juice (2 tablespoons for watermelon, 1 tablespoon for kiwi): Fresh is non negotiable here because the bottled stuff tastes flat and metallic against the sweetness of the fruit.
- Agave syrup or honey (1 to 2 tablespoons for watermelon, 1 tablespoon for kiwi): This is optional depending on how sweet your fruit is, so taste your purée before adding anything and let the fruit do the talking.
- Ripe kiwis (3, peeled and sliced): Gently press the outside and if it yields just slightly, you have a good one, but if it feels mushy or rock hard, walk away.
Instructions
- Blend the watermelon base:
- Toss the watermelon cubes, lime juice, and sweetener into your blender and let it rip until you have a silky pink liquid with no chunks hiding anywhere.
- Fill the molds partway:
- Pour the watermelon purée into each popsicle mold, stopping at about two thirds full, then tap the molds on your counter a few times to knock out any sneaky air bubbles trapped at the bottom.
- Give the first layer a head start:
- Slide the molds into the freezer for roughly one hour, just until the surface is firm enough to support a second layer without the colors bleeding together into a muddy pink green situation.
- Blend the kiwi layer:
- While the watermelon sets up, blend the kiwi slices with lime juice and sweetener until the mixture is smooth, vibrant green, and tastes like a tropical morning.
- Add the second layer and sticks:
- Pour the kiwi purée gently over the firmed watermelon layer, filling each mold almost to the brim, then insert the popsicle sticks straight into the center so they stand tall and proud.
- Freeze until rock solid:
- Return everything to the freezer for at least three hours, and I know the waiting is agonizing, but patience is what separates a beautiful layered pop from a slushy disappointment.
- Unmold with care:
- Run warm water over the outside of each mold for a few seconds, then ease the pop out with a gentle steady pull instead of yanking like you are starting a lawnmower.
 Save to Pinterest
 The first time I served these at a backyard gathering, my friends five year old twin boys each ate two and then tried to hide a third in their backpack for later, which felt like the highest compliment a frozen treat could receive.
Making Them Look Beautiful
For a showstopper effect, press thin kiwi slices against the inside walls of each mold before adding any liquid, so the fruit becomes visible through the frozen surface like little green windows. A sprig of mint pressed into the side adds a fleck of brightness that photographs beautifully and gives people a hint of the freshness waiting inside.
Playing With Flavors
Once you nail the basic technique, start swapping fruits to your mood, because mango and strawberry layered together taste like a sunset, or try peach and raspberry when August hands you a paper bag of ripe fruit from a roadside stand. The formula stays the same: blend each fruit separately, freeze the bottom layer until firm, add the second layer, and wait.
Tools and Practical Stuff
You do not need fancy equipment but a decent blender and proper popsicle molds will make your life significantly easier than trying to rig something with paper cups and wooden spoons, which I have attempted and cannot recommend.
- Silicone molds release the pops much more willingly than rigid plastic ones, saving you from that awkward warm water tap dance.
- If you lost your sticks, wooden craft sticks from any craft store work identically and cost almost nothing.
- Always lay out a towel under your workstation because fruit purée has an uncanny talent for finding every exposed surface in your kitchen.
 Save to Pinterest
 Every summer now I keep a batch tucked in the back of my freezer like a secret weapon against miserable afternoons, and honestly they have never once failed to improve my mood in under five minutes.
Recipe FAQs
- → How long do these frozen pops last?
-
These treats will keep well in the freezer for up to 2-3 weeks when stored in airtight containers or wrapped individually. For best texture and flavor, enjoy within the first week.
- → Can I use other fruits in this recipe?
-
Absolutely! Try combinations like strawberry-mango, peach-raspberry, or pineapple-coconut. The key is choosing fruits with similar textures and vibrant colors for the most visually appealing results.
- → Do I need a special type of mold?
-
Any popsicle mold will work, or you can use small paper cups with wooden sticks. Silicone molds are easiest for removing frozen treats, but traditional plastic molds work perfectly too.
- → Is the sweetener necessary?
-
Not at all! The natural sugars in ripe watermelon and kiwi provide plenty of sweetness. Add sweetener only if your fruit isn't quite ripe enough or if you prefer an extra touch of sweetness.
- → Why freeze in layers instead of mixing the fruits?
-
Freezing in separate layers creates that gorgeous striped appearance and lets each fruit's flavor shine distinctly. It also prevents the colors from muddying together, resulting in a more impressive presentation.
- → Can I make these without a blender?
-
You can mash the fruits thoroughly with a fork or potato masher, though the texture will be slightly chunkier. For the smoothest consistency, a blender or food processor works best.
