 Save to Pinterest
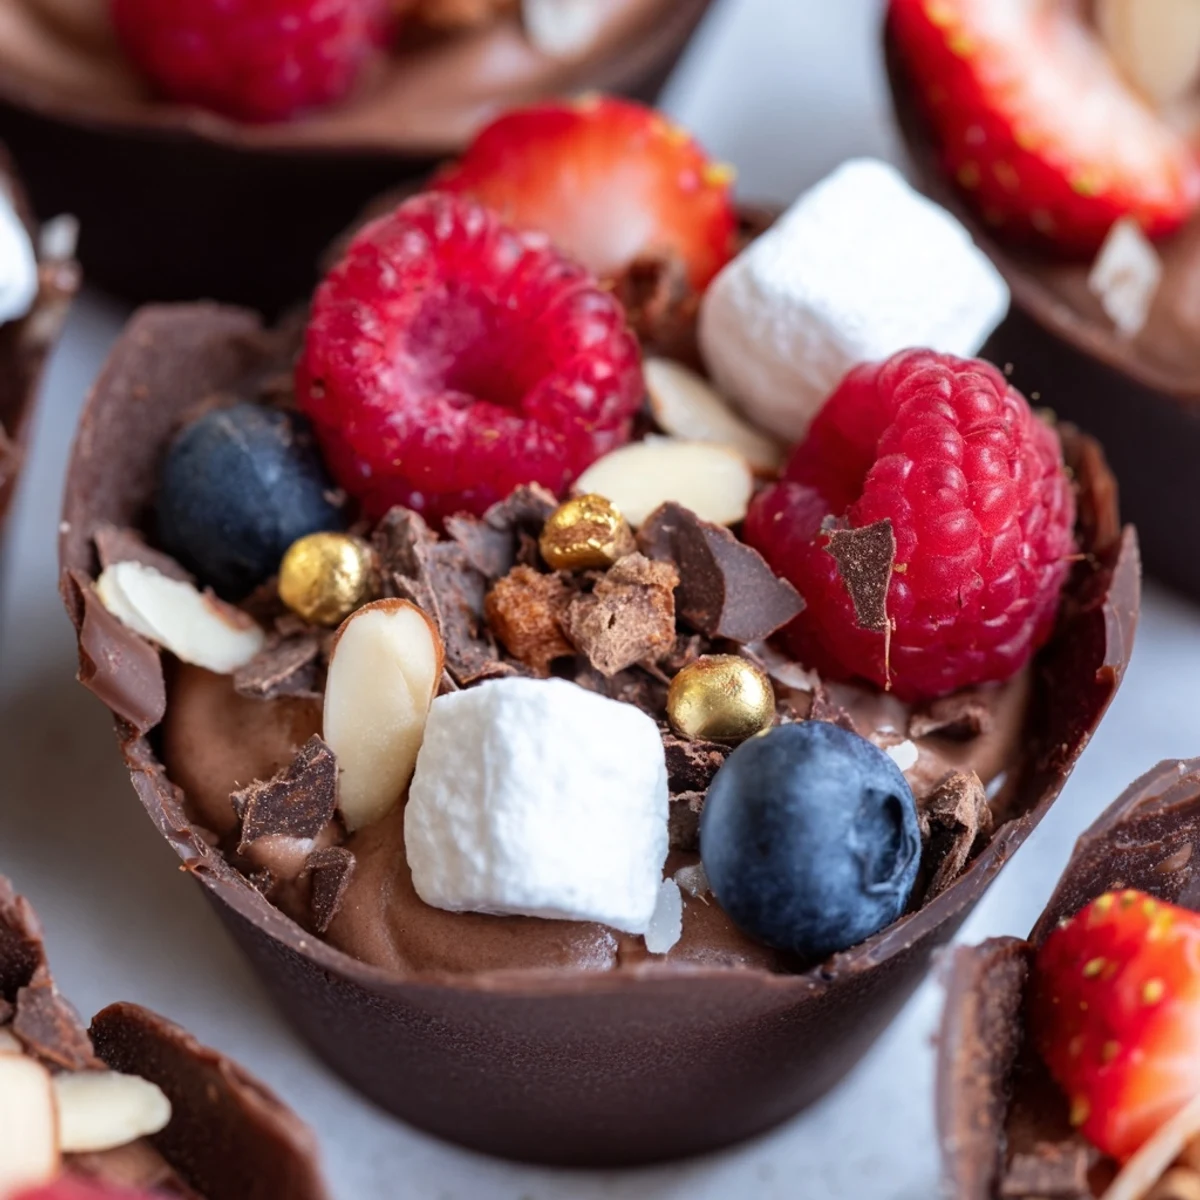
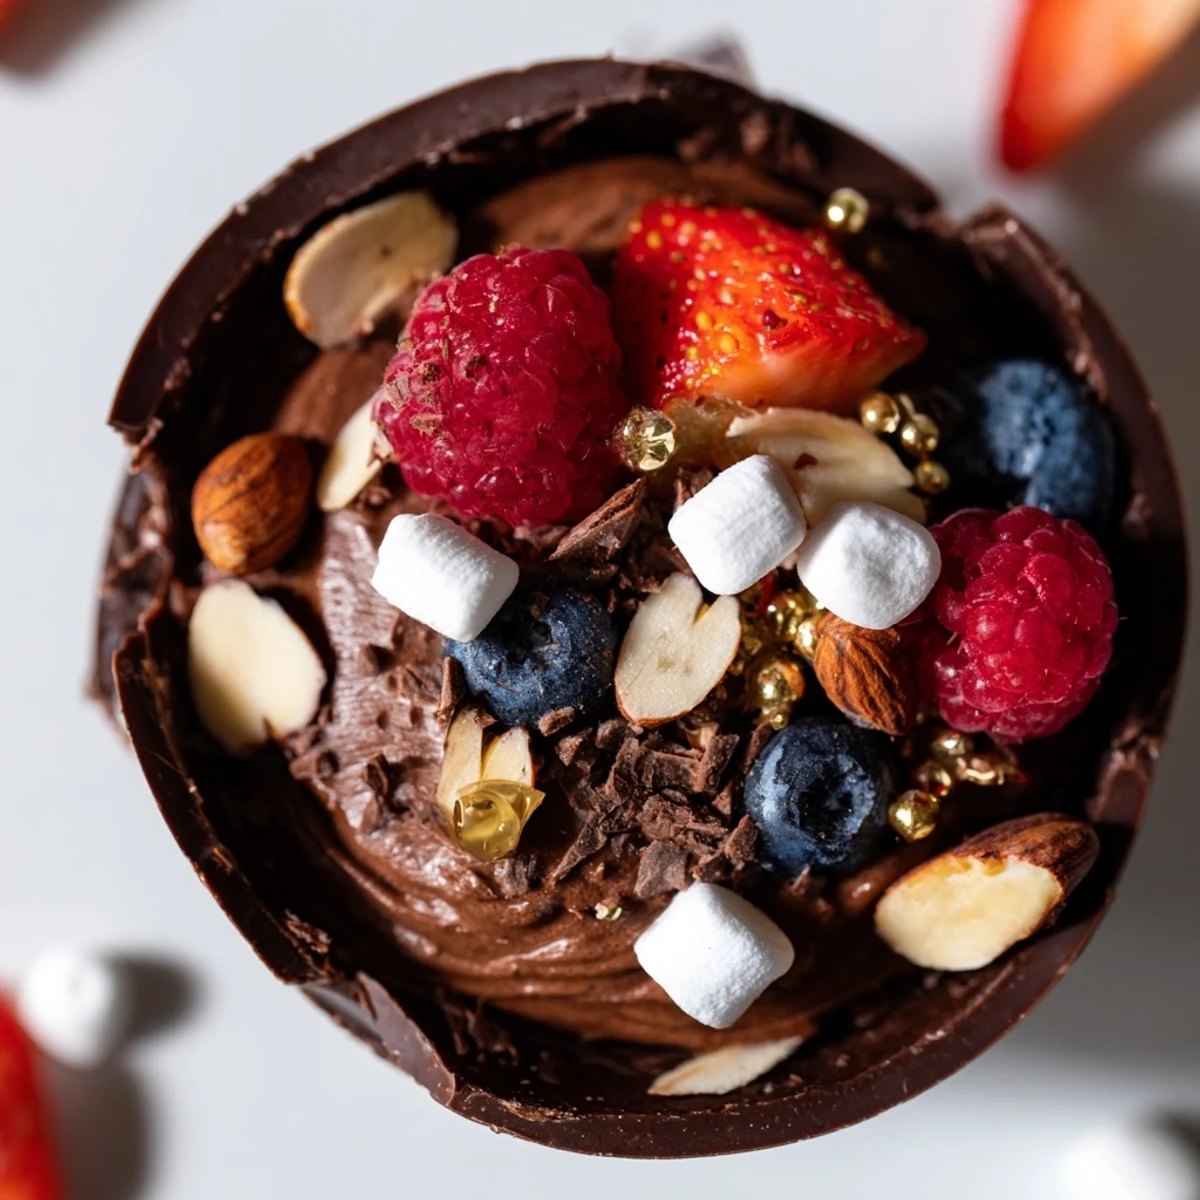
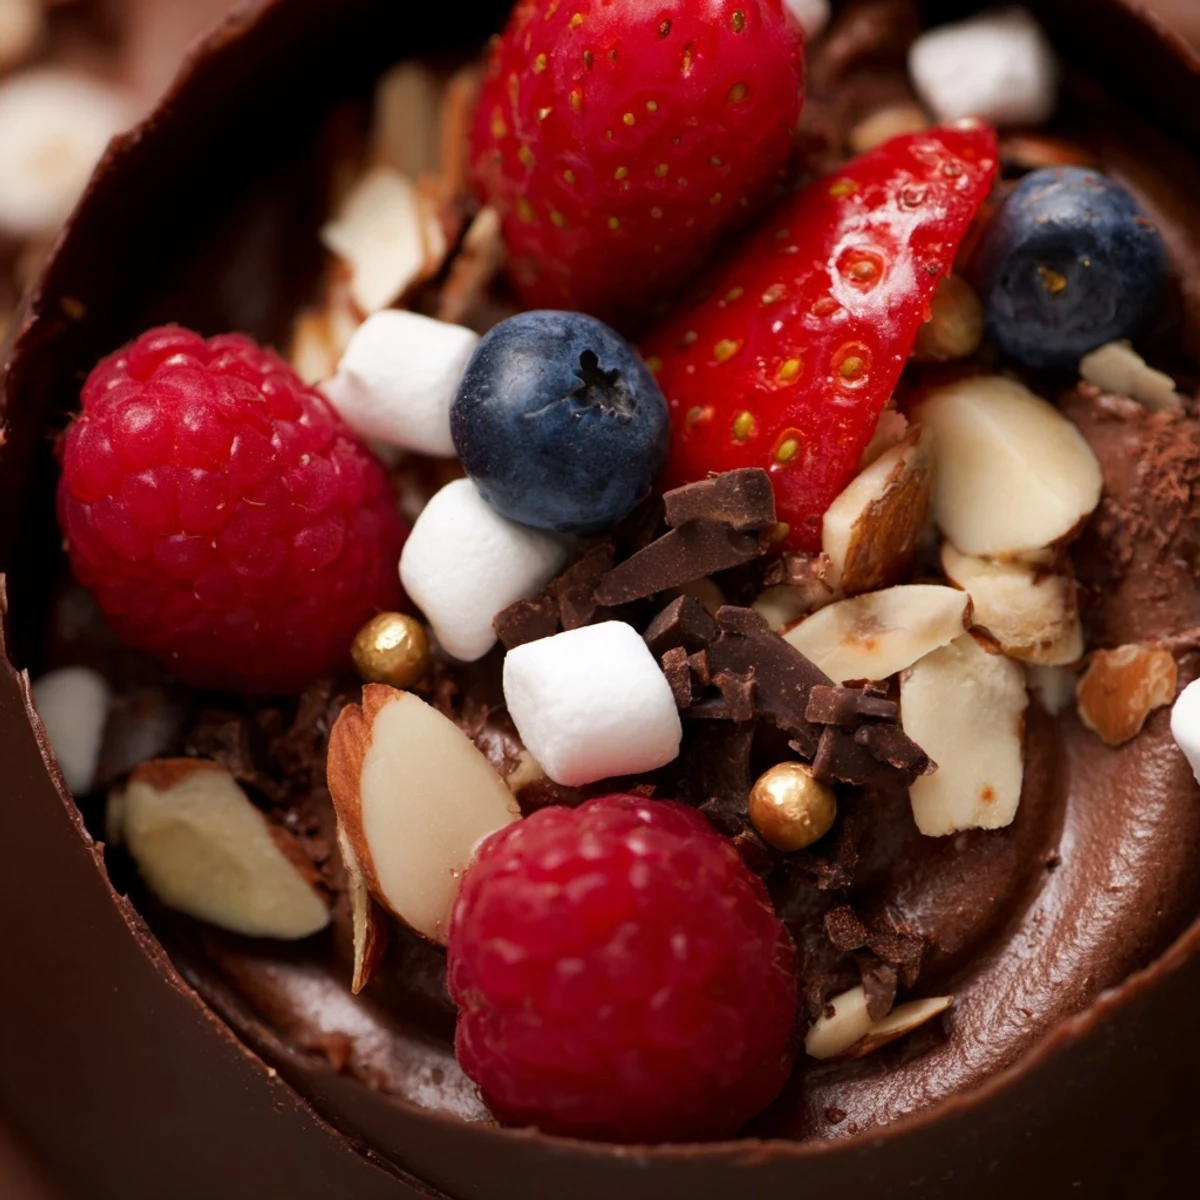
 Create stunning chocolate grazing cups that elevate any dessert table. These elegant treats begin with handmade dark chocolate cups crafted from melted 60% cocoa chocolate, chilled until perfectly set. Fill each cup with silky chocolate mousse whipped from heavy cream, melted dark chocolate, powdered sugar, and vanilla extract until light and airy.
The magic happens in the toppings—scatter fresh mixed berries including raspberries, strawberries, and blueberries for brightness. Add crunch with chopped hazelnuts, almonds, or pistachios, then sprinkle mini marshmallows and delicate chocolate curls. For ultimate luxury, finish with edible gold leaf or pearls that catch the light beautifully.
These individual portions take just 25 minutes to prepare plus chilling time, yielding six impressive cups. The combination of velvety mousse, sweet-tart berries, and varied textures creates an unforgettable dessert experience. Customize by swapping white or milk chocolate, or add orange liqueur to the mousse for a sophisticated adult twist. Best enjoyed fresh on the day of serving with dessert wine or coffee.
Last Valentine's Day, I attempted an elaborate chocolate lava cake that collapsed into a puddle. My husband still ate every bite and declared it the best dessert he'd ever had. That disaster sparked my obsession with individual portions that look impressive but are actually foolproof. These chocolate cups became my redemption story.
I made these for my best friend's engagement party last spring. Her aunt asked for the recipe four times throughout the evening. Someone accidentally knocked one off the dessert table and literally caught it before it hit the ground—nobody was letting that chocolate go to waste.
Ingredients
- Dark chocolate (at least 60% cocoa): Higher cocoa percentage creates cups that hold their shape better and taste more sophisticated
- Heavy cream: Must be cold for proper whipping structure in the mousse
- Fresh mixed berries: The tart fruit cuts through the rich chocolate beautifully
- Chopped nuts: Toast them beforehand for an extra layer of flavor
Instructions
- Creating Your Chocolate Cups:
- Melt the chocolate in 30 second bursts, stirring between each to prevent seizing. Paint the cupcake liners with a generous but even layer—the thickness determines how sturdy your cups will be.
- Whipping Up Silky Mousse:
- Fold the melted chocolate gently into the whipped cream to preserve all that air you worked to create. Stop when no streaks remain.
- Assembling the Masterpieces:
- Fill each chocolate cup about two thirds full with mousse, leaving room for toppings to shine. Arrange everything artfully rather than piling it on.
 Save to Pinterest
 My six year old niece helped me make a batch during her visit last month. She took her job arranging the berries so seriously that each cup looked like a tiny masterpiece. Now she asks every time she comes over if we're making 'the fancy chocolate thing.'
Making It Your Own
White chocolate cups with raspberry mousse taste like sunshine on a plate. Sometimes I sprinkle sea salt on top—sweet and salty is practically its own food group. During peppermint season, crushed candy canes transform these into winter magic.
Timing Everything Right
The cups need 20 minutes to set completely in the fridge before you can touch them. I always start them first thing when I'm planning a party menu. They actually keep well in the fridge for up to 24 hours after assembly, though the texture is best same day.
Presentation Secrets
Arrange the cups on a rustic wooden board or slate platter for maximum impact. Fresh mint leaves tucked between cups make everything look greener and more expensive. Cluster three cups on small individual plates for dessert service.
- Use edible flowers like pansies for a stunning spring touch
- Write names on small flags and stake them into each cup for place settings
- Always have a few backup cups ready in case of breakage
 Save to Pinterest
 There's something genuinely magical about handing someone a cup made entirely of chocolate and watching their eyes light up before they even take a bite.
Recipe FAQs
- → Can I make chocolate grazing cups ahead of time?
-
Prepare chocolate cups and mousse up to 24 hours in advance. Store cups separately at room temperature in an airtight container. Keep mousse refrigerated. Assemble with toppings just before serving for optimal texture and appearance.
- → What chocolate percentage works best for grazing cups?
-
Dark chocolate with at least 60% cocoa provides the ideal balance—rich enough to hold shape as cups but not too bitter for the mousse. Higher percentages up to 70% work beautifully for intense chocolate lovers seeking depth of flavor.
- → How do I prevent chocolate cups from cracking or breaking?
-
Ensure chocolate is melted completely smooth before brushing into liners. Apply thick, even layers and chill thoroughly until completely firm. Carefully peel liners away slowly. Work in a cool environment to prevent melting during handling.
- → What alternatives work for fresh berries in these cups?
-
Fresh berries provide essential brightness and acidity to balance rich chocolate. When unavailable, substitute with poached pears, roasted stone fruits, candied citrus segments, or even fresh pomegranate seeds for similar color contrast and tart sweetness.
- → Can chocolate grazing cups be made dairy-free?
-
Yes, substitute coconut cream or full-fat coconut milk for heavy cream in the mousse. Use dairy-free dark chocolate—verify labels for milk derivatives. Coconut milk whips beautifully into mousse-like texture, though flavor will have subtle coconut notes.
- → What's the best way to melt chocolate for cups and mousse?
-
Use a double boiler method for most control—simmer water in a pot, place heatproof bowl on top ensuring water doesn't touch bowl. Stir continuously until 75% melted, remove from heat, stir to finish melting. Microwave at 50% power in 30-second intervals works too.
