 Save to Pinterest
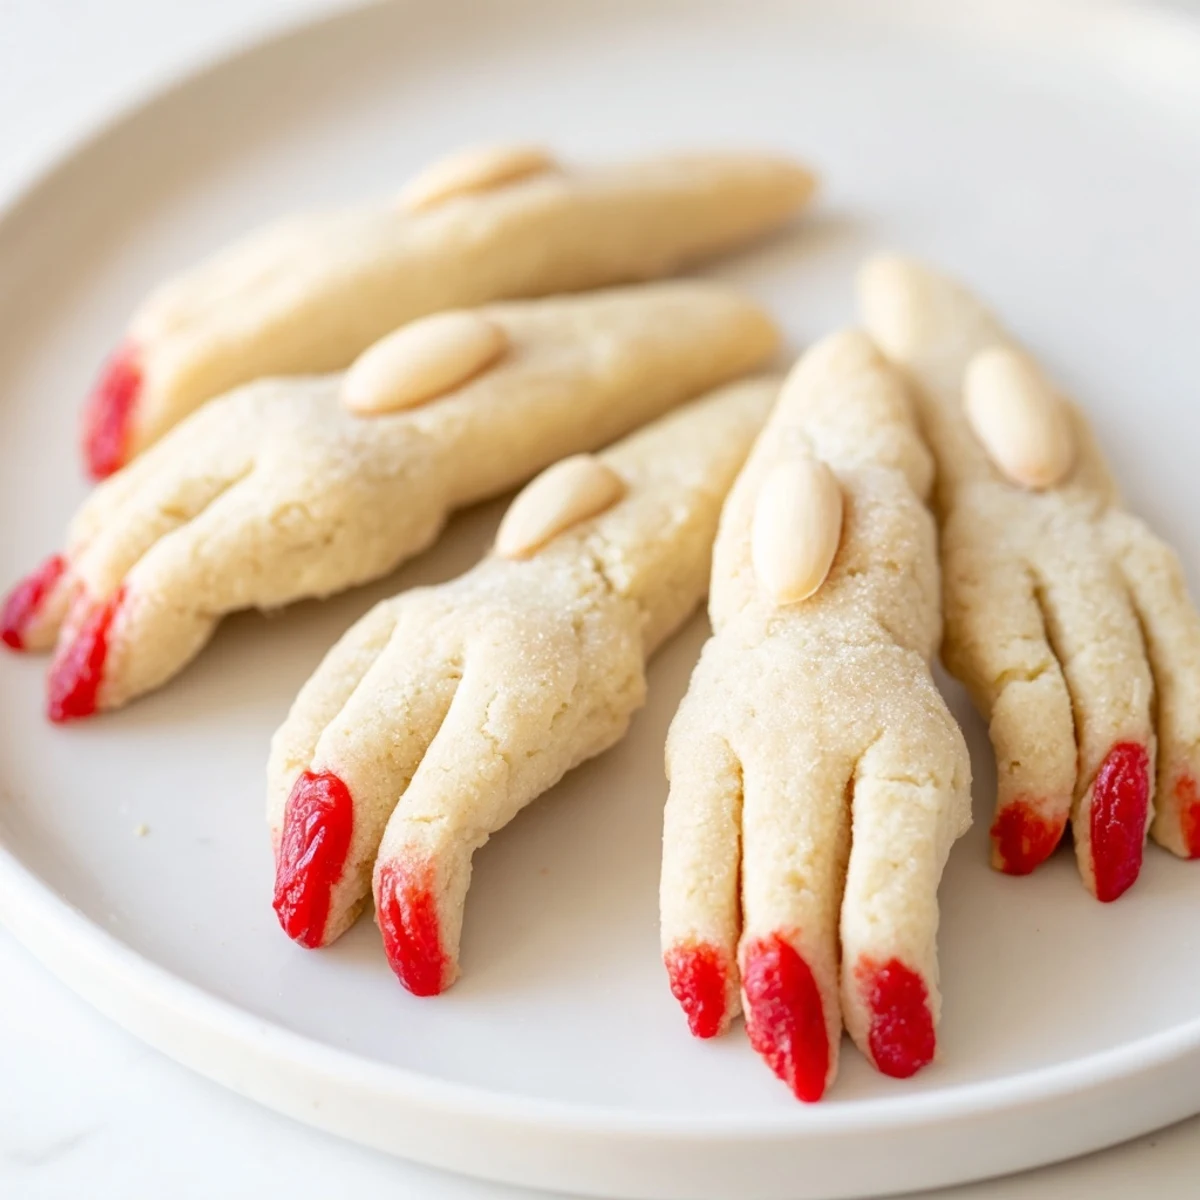
 Create these frightfully fun witch-shaped cookies for your next Halloween celebration. These almond-flavored treats feature realistic finger details with blanched almond "fingernails" and a spooky blood effect using red food coloring or jam. The buttery vanilla-almond dough comes together quickly and bakes into perfectly creepy fingers that will delight party guests of all ages.
Shaping the cookies is part of the fun — simply roll the dough into finger-length cylinders, score knuckle lines with a knife, and press an almond at the tip. The finishing touch of red coloring or jam creates an authentic ghoulish appearance. Make them ahead of time or get the whole family involved in the shaping process for a memorable Halloween baking activity.
The year my daughter decided she was too old for cute Halloween cookies and wanted something truly grotesque, I panicked. She handed me a magazine page featuring these witch fingers and dared me to make them for her middle school party. I stayed up until midnight carving knuckle details and arranging severed digits on a platter, feeling slightly unhinged but oddly proud of my work.
My neighbor walked in while I was hunched over the kitchen table, meticulously scoring raw dough with a paring knife. She watched in horrified fascination for a full minute before asking if I needed to talk about something. We ended up making an assembly line of it, and now she requests these every October even though her teenage kids pretend to be traumatized.
Ingredients
- Unsalted butter: Softened perfectly to room temperature makes the difference between dough that cracks while shaping and dough that cooperates
- Granulated sugar: Cream this thoroughly with the butter until the mixture looks pale and fluffy, about 3 full minutes
- Pure vanilla and almond extracts: The almond extract gives these cookies their distinctively sophisticated flavor that balances the gimmicky appearance
- All-purpose flour: Measure by spooning into your measuring cup and leveling off, or the dough becomes too stiff to shape properly
- Baking powder and salt: These give the cookies just enough lift without puffing up and losing their finger-like shape
- Whole blanched almonds: Look for uniformly sized ones so the fingernails look consistent across your severed hand collection
- Red gel food coloring or strawberry jam: Jam creates a more realistic, slightly glossy blood effect than plain food coloring
Instructions
- Get your oven and workspace ready:
- Preheat to 325°F and line two baking sheets with parchment paper, clearing off counter space for your finger-rolling station
- Cream the butter and sugar:
- Beat the softened butter and granulated sugar until the mixture turns pale and fluffy, scraping down the bowl halfway through
- Add the wet ingredients:
- Beat in the egg, vanilla extract, and almond extract until everything disappears into a smooth, uniform mixture
- Whisk the dry ingredients:
- In a separate bowl, combine the flour, baking powder, and salt until no white spots remain
- Bring the dough together:
- Gradually add the flour mixture to the butter mixture, mixing just until the dough holds together when squeezed
- Shape the fingers:
- Scoop about 1 tablespoon of dough and roll between your palms into cylinders 3 to 4 inches long, making them slightly thinner at one end
- Add the gruesome details:
- Use a knife to score three horizontal lines for knuckles, then press an almond firmly into the thicker end for a fingernail
- Bake until just golden:
- Arrange fingers 2 inches apart on prepared sheets and bake for 18 to 20 minutes until bottoms are lightly golden
- Create the bloody effect:
- Carefully remove each almond, dab red food coloring or jam underneath, and press the almond back into place
- Let them cool completely:
- Transfer to a wire rack and let cool fully before serving, as the fingernails need time to set
 Save to Pinterest
 My niece took one bite at our Halloween party and immediately started giggling uncontrollably. She spent the next twenty minutes arranging the cookies in increasingly creative patterns on every available surface, creating little scenes that somehow managed to be both adorable and absolutely disturbing.
Making Them Look Extra Creepy
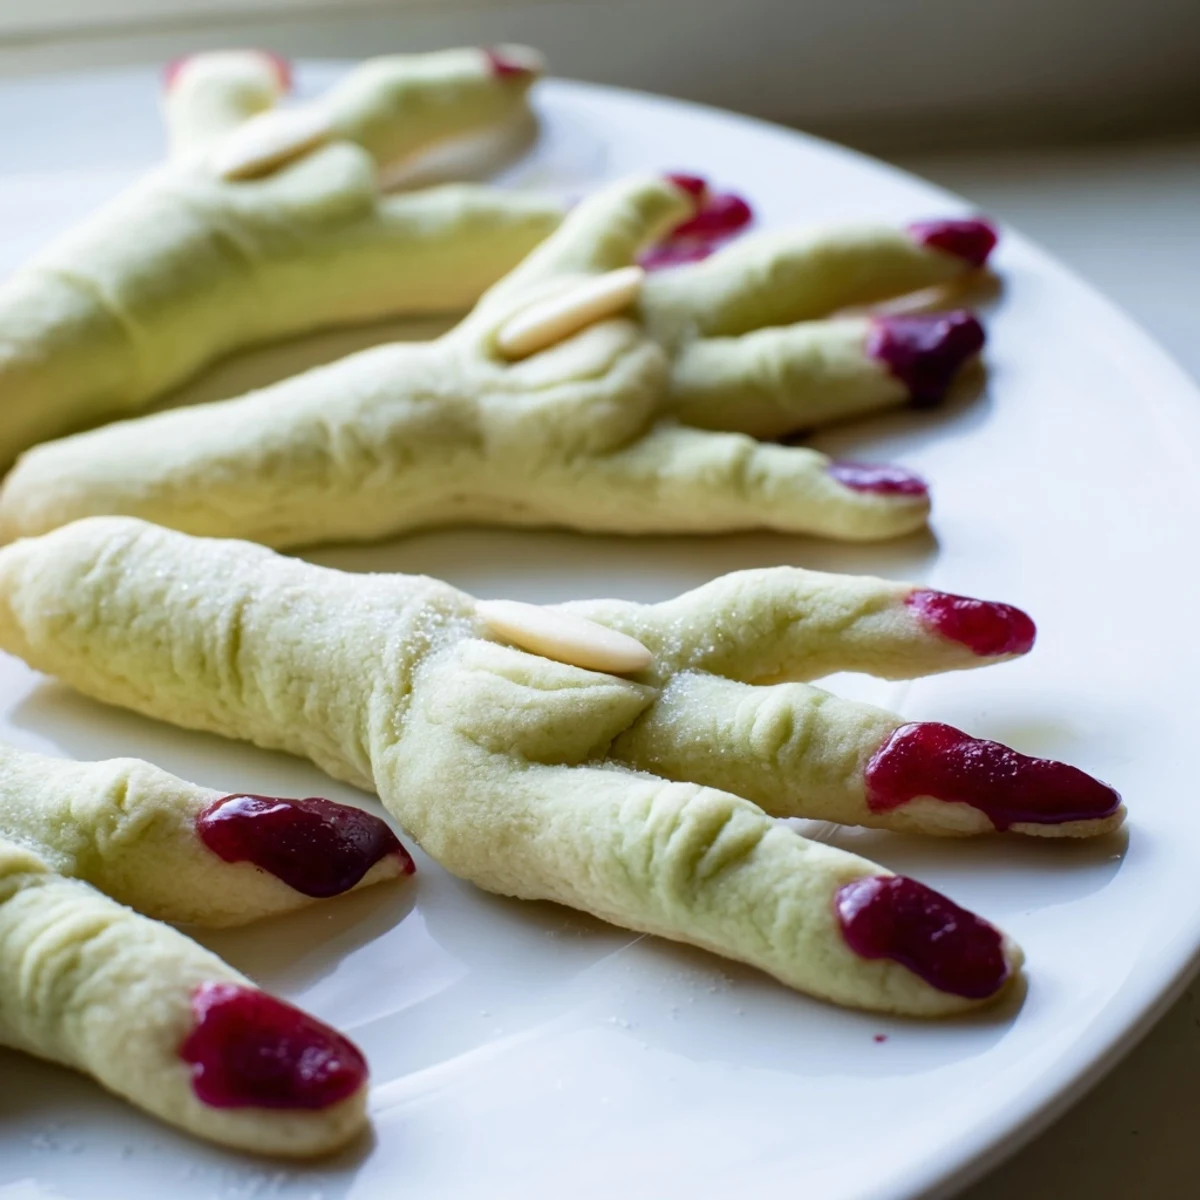
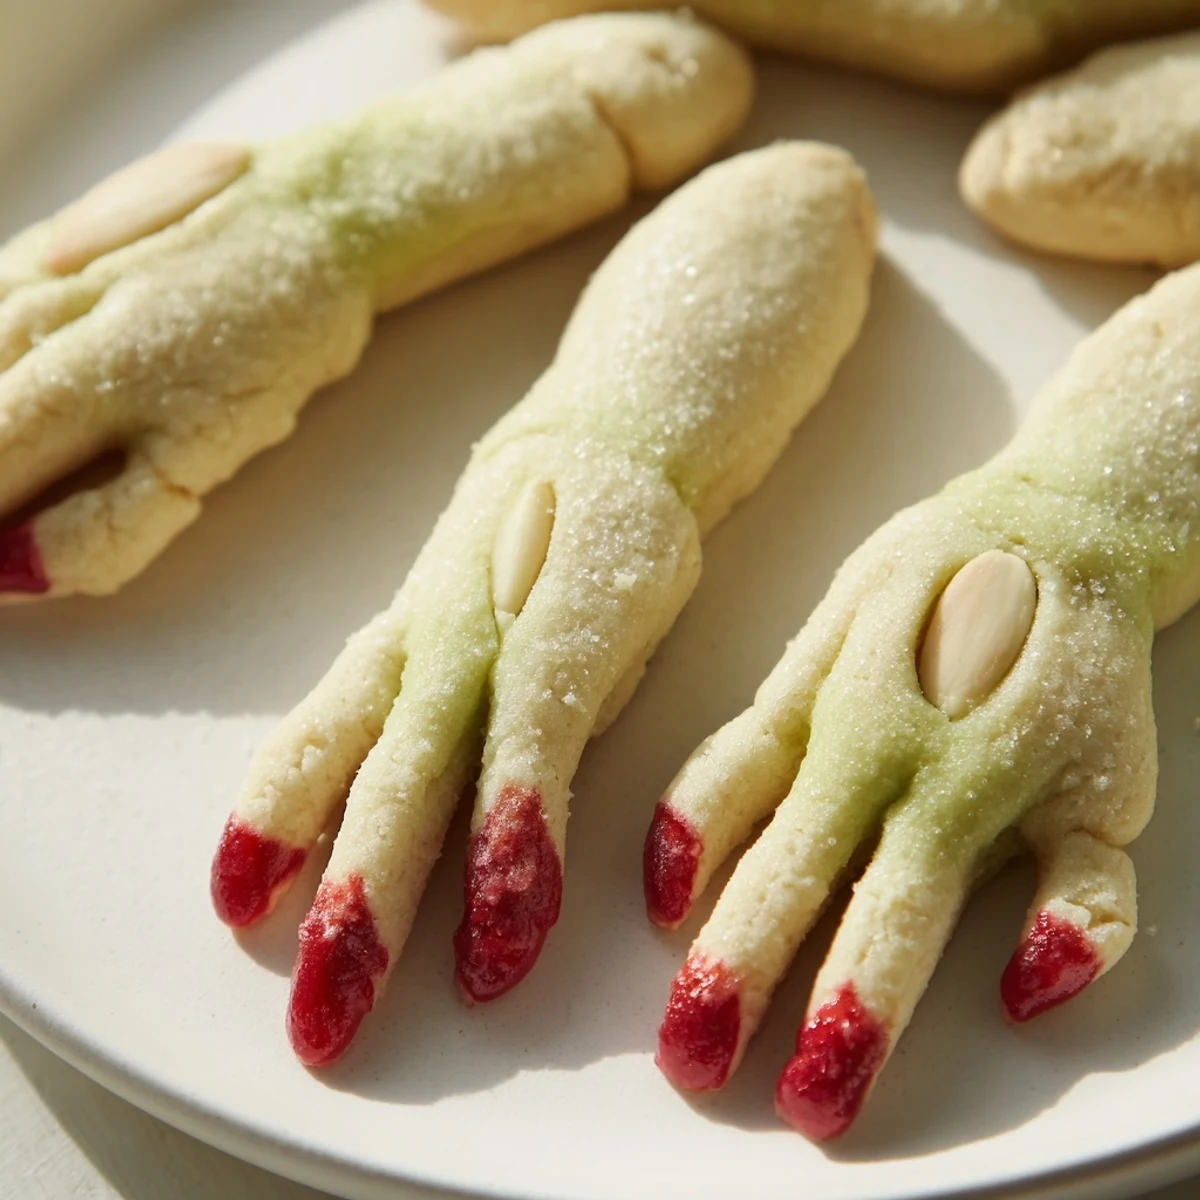
Tint small portions of dough with green or gray food coloring before shaping to create varied skin tones. The imperfections make them look more realistic and less uniform, which somehow enhances the horror factor while keeping them recognizable as cookies.
Serving Suggestions
Arrange them cascading out of a black cauldron or scattered across a wooden cutting board as if someone dropped them mid-preparation. The presentation matters almost as much as the cookies themselves when it comes to getting that perfect reaction from guests.
Storage and Make-Ahead Tips
The dough keeps beautifully in the refrigerator for up to three days, and you can even freeze shaped raw fingers on a baking sheet before transferring them to a freezer bag. Bake them straight from frozen, adding just 2 to 3 extra minutes to the cooking time.
- Store baked cookies in an airtight container with parchment paper between layers
- The almond fingernails may soften slightly after the first day but still taste delicious
- Apply the bloody effect just before serving for maximum freshness and appearance
 Save to Pinterest
 These cookies have become such a tradition that my kids now argue over who gets to help with the knuckle carving each year. Somehow the most gruesome dessert on the table always disappears first.
Recipe FAQs
- → How far ahead can I make these witch finger cookies?
-
You can prepare the dough up to 2 days in advance and store it refrigerated. Shape and bake when ready. Fully baked cookies stay fresh for 5-7 days in an airtight container at room temperature, or freeze for up to 3 months.
- → What can I use instead of almonds for the fingernails?
-
If avoiding nuts, try slivered almonds, cashew pieces, pecan halves, or shape fingernails from dough. Candy corn pieces, white chocolate chips, or even jelly beans work for nut-free versions.
- → How do I get the best bloody effect?
-
Strawberry or raspberry jam creates the most realistic dripping blood effect. Apply a small amount to the nail bed after baking while slightly warm. Red gel food coloring works well for more controlled, less messy application.
- → Can I make these cookies green for extra creepiness?
-
Absolutely! Add green food coloring to the dough before shaping. Start with 2-3 drops and adjust until you reach your desired witchy skin tone. Pale gray and purple also work wonderfully for ghoulish variations.
- → Why do my almond fingernails fall off?
-
Gently press the almonds into the dough before baking, creating a small indentation. If they still loosen, attach them with a dab of corn syrup or melted chocolate after cooling. The jam blood effect also helps secure them in place.
- → Can I double this recipe for large parties?
-
Yes, this recipe doubles easily. You'll need additional baking sheets or bake in batches. The yield is approximately 24 cookies per batch, so doubling gives 48 witch fingers — perfect for bigger Halloween gatherings.
