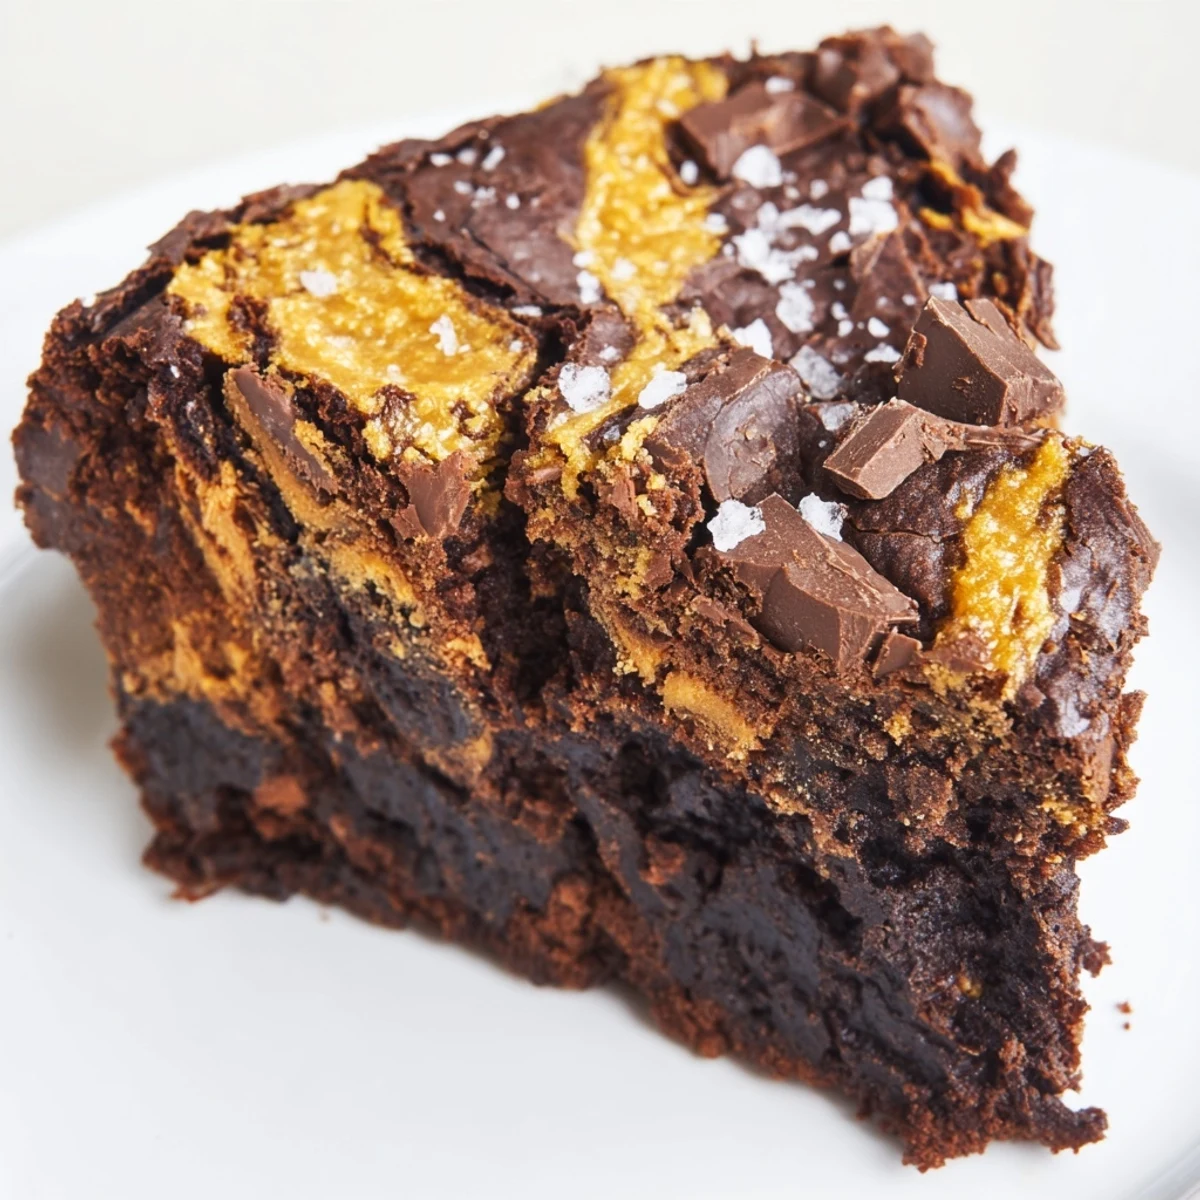
 Save to Pinterest
 These brownies combine rich melted butter and both granulated and brown sugars for a smooth, glossy base. Cocoa powder and chopped dark chocolate add deep chocolate flavor and texture. A luscious salted caramel is gently swirled throughout for a sweet and salty balance. Baking until moist with a tender crumb, they offer a perfect indulgence served slightly warm or at room temperature. The result is a decadent dessert bursting with fudgy chocolate and caramel notes.
There's a particular kind of magic that happens when you pour melted chocolate into a mixing bowl on a quiet afternoon—the way it releases that unmistakable cocoa perfume that fills the entire kitchen. I discovered these brownies almost by accident, really, when I was experimenting with drizzling caramel across dark batter and watching it create those beautiful, chaotic swirls. What started as curiosity became the dessert I kept making, the one people asked for by name.
I'll never forget bringing a batch of these to a friend's dinner party and watching someone's face light up the moment they bit into one—that pause where they registered the caramel, the sea salt, the way the chocolate just melted. It became the dessert that started conversations, the one people lingered over with coffee, asking if I'd made them myself.
Ingredients
- Unsalted butter (170 g melted): Use good butter; it's the foundation of richness here, and melting it first creates a silky base that helps everything combine smoothly.
- Granulated and brown sugar (300 g total): The combo gives you structure from granulated and deep molasses notes from brown—don't skip either one.
- Eggs (2 large): Room temperature eggs mix in more evenly and create that glossy, luxurious batter texture.
- Vanilla extract (1 tsp): A small amount that somehow makes the chocolate taste more like itself, darker and more complex.
- All-purpose flour (90 g): Sift it; I learned this the hard way when overmixing created dense, tough brownies.
- Unsweetened cocoa powder (60 g): The backbone of flavor—don't use Dutch-processed if you want that deeper, slightly bitter chocolate bite.
- Sea salt (½ tsp in brownies, ½ tsp in caramel): Each pinch does different work: in the batter it awakens chocolate, in the caramel it creates that addictive contrast.
- Dark chocolate, chopped (100 g): Chunks of real chocolate scattered through make texture interesting and add little bursts of intensity.
- Granulated sugar for caramel (100 g): This transforms into liquid amber and needs constant attention—rushing or ignoring it is how batches turn bitter.
- Unsalted butter for caramel (45 g): Separate from the brownie butter; add it when the sugar is golden, not before.
- Heavy cream (60 ml): Cold cream added to hot caramel creates that dramatic bubble—it's startling the first time you do it, completely normal the second.
Instructions
- Heat and prepare:
- Set your oven to 175°C and line that 8x8-inch pan with parchment, leaving edges hanging over the sides like handles. This makes pulling them out later feel almost effortless.
- Make the caramel:
- Pour sugar into a dry saucepan and set it over medium heat—don't stir at first, just let it begin to melt at the edges, then gently stir the melted parts into the unmelted. Watch it transform from white crystals to pale amber, then deeper gold; this takes about 8 to 10 minutes and the moment it smells nutty and rich, you're close. Remove from heat, add the cubed butter, whisk until it disappears, then very carefully pour in the cold cream (it will bubble and steam—this is completely right). Stir in your salt and let it cool while you make the brownies.
- Combine wet ingredients:
- In a large bowl, whisk together the melted butter and both sugars until they feel smooth and combined, about a minute. Add your eggs one at a time, then the vanilla, whisking until the whole mixture turns glossy and slightly pale—this takes the air into the batter.
- Fold in dry ingredients:
- Sift the flour, cocoa powder, and salt directly over the wet mixture, then fold gently with a spatula until you can barely see streaks of dry flour. Stir in the chopped chocolate pieces.
- Layer and swirl:
- Pour the batter into your prepared pan and smooth it into an even layer. Drizzle the cooled caramel over the top in a loose pattern, then take a knife or skewer and drag it through the batter in figure-eight patterns to create those beautiful marbled swirls.
- Bake:
- Slide the pan into the oven and bake for 28 to 32 minutes, depending on how fudgy you like them. Pull out one of your toothpicks and insert it near the center; it should come out with a few moist crumbs clinging to it, not clean but not wet. The pan will still seem slightly underbaked—this is exactly right.
- Cool and cut:
- Let the brownies cool completely in the pan (this sets everything up so they cut cleanly), then lift out using those parchment handles and cut into twelve squares using a sharp knife wiped clean between cuts.
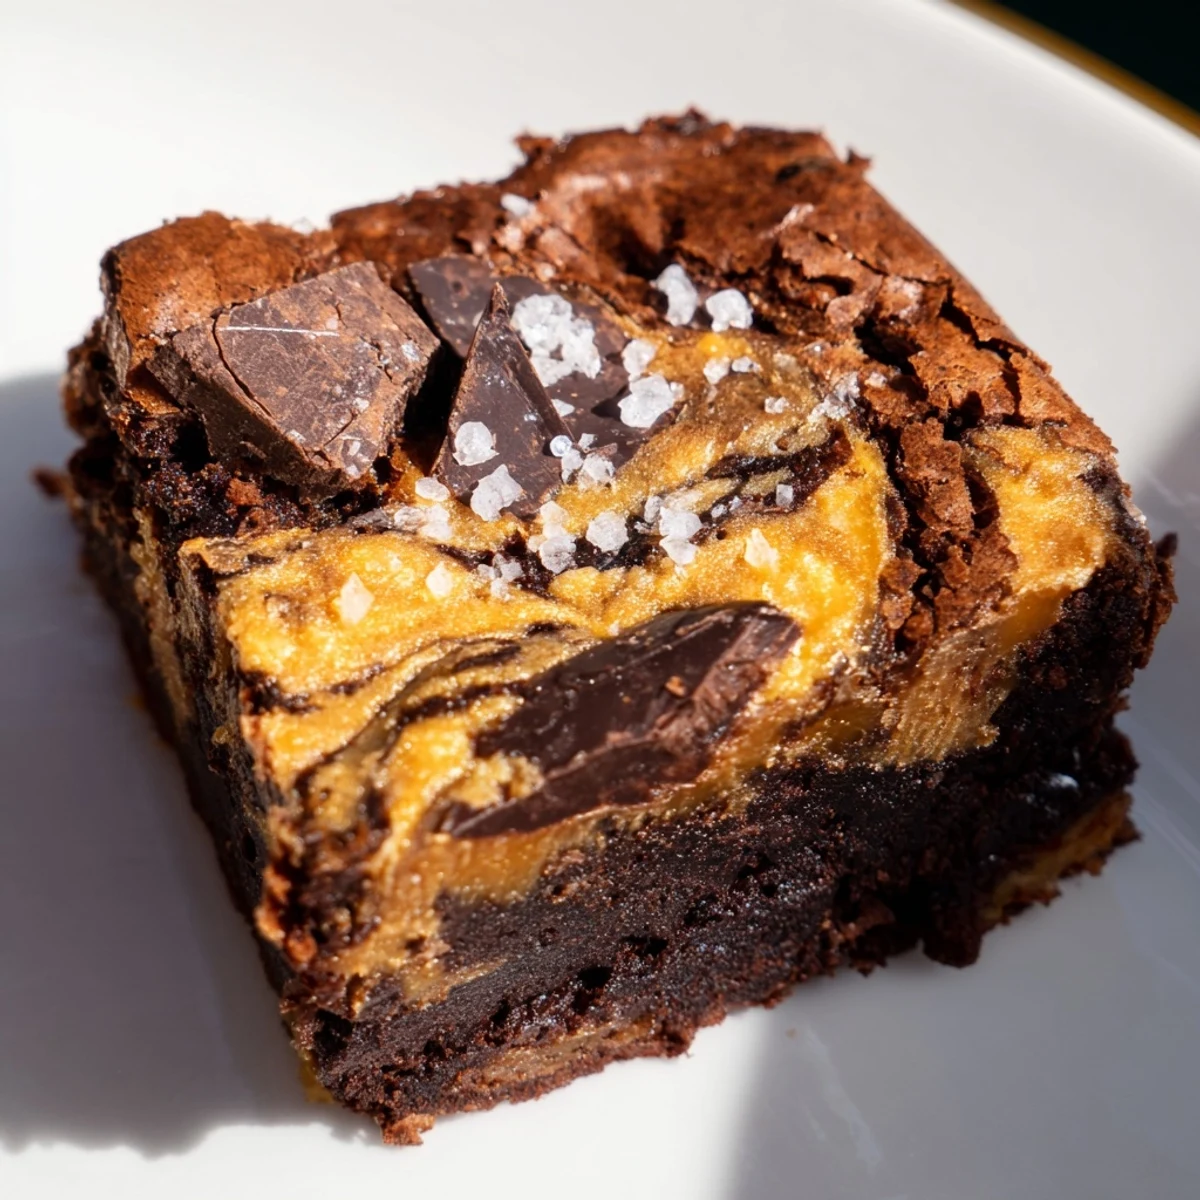 Save to Pinterest
 These brownies taught me that sometimes the most elegant desserts come from simple combinations treated with care. There's something deeply satisfying about serving something beautiful that you've made with your own hands, watching people choose between another slice and dessert guilt.
The Caramel Secret
Making caramel feels like negotiating with fire the first time you try it, but once you understand that it's really just sugar molecules changing color under heat, it becomes less scary. The difference between perfect amber and bitter-burnt caramel is maybe one minute, so pay attention to the smell more than the clock. If you keep a small glass of cold water nearby and let a drop fall in periodically, you'll see the caramel's actual temperature without guessing.
Storage and Serving Ideas
These brownies actually taste better on day two or three, once everything has set and the flavors have deepened. Keep them in an airtight container at room temperature, and they'll stay wonderful for up to four days—though honestly, they rarely last that long. Serving them slightly warm with vanilla ice cream is where the real magic happens; the ice cream melts into the still-warm fudge, creating something between a brownie and a sundae.
Making Them Your Own
The base recipe is sturdy enough to handle additions and variations, which is why I keep making different versions depending on the season or who I'm baking for. Some people swear by toasted pecans or walnuts stirred into the batter, while others prefer espresso powder whisked in to deepen the chocolate even further. The caramel is so good that it doesn't need help, but if you want to push it, a tiny pinch of cayenne in the brownie batter creates a subtle heat that surprises people without making them aware of why they keep coming back for more.
- Try adding a quarter teaspoon of espresso powder to make the chocolate flavor almost haunting in its depth.
- Toast nuts before stirring them in; raw nuts disappear into the richness, but toasted ones remain crisp and interesting.
- If you're nervous about caramel, you can substitute it with a good salted dulce de leche and still create something spectacular.
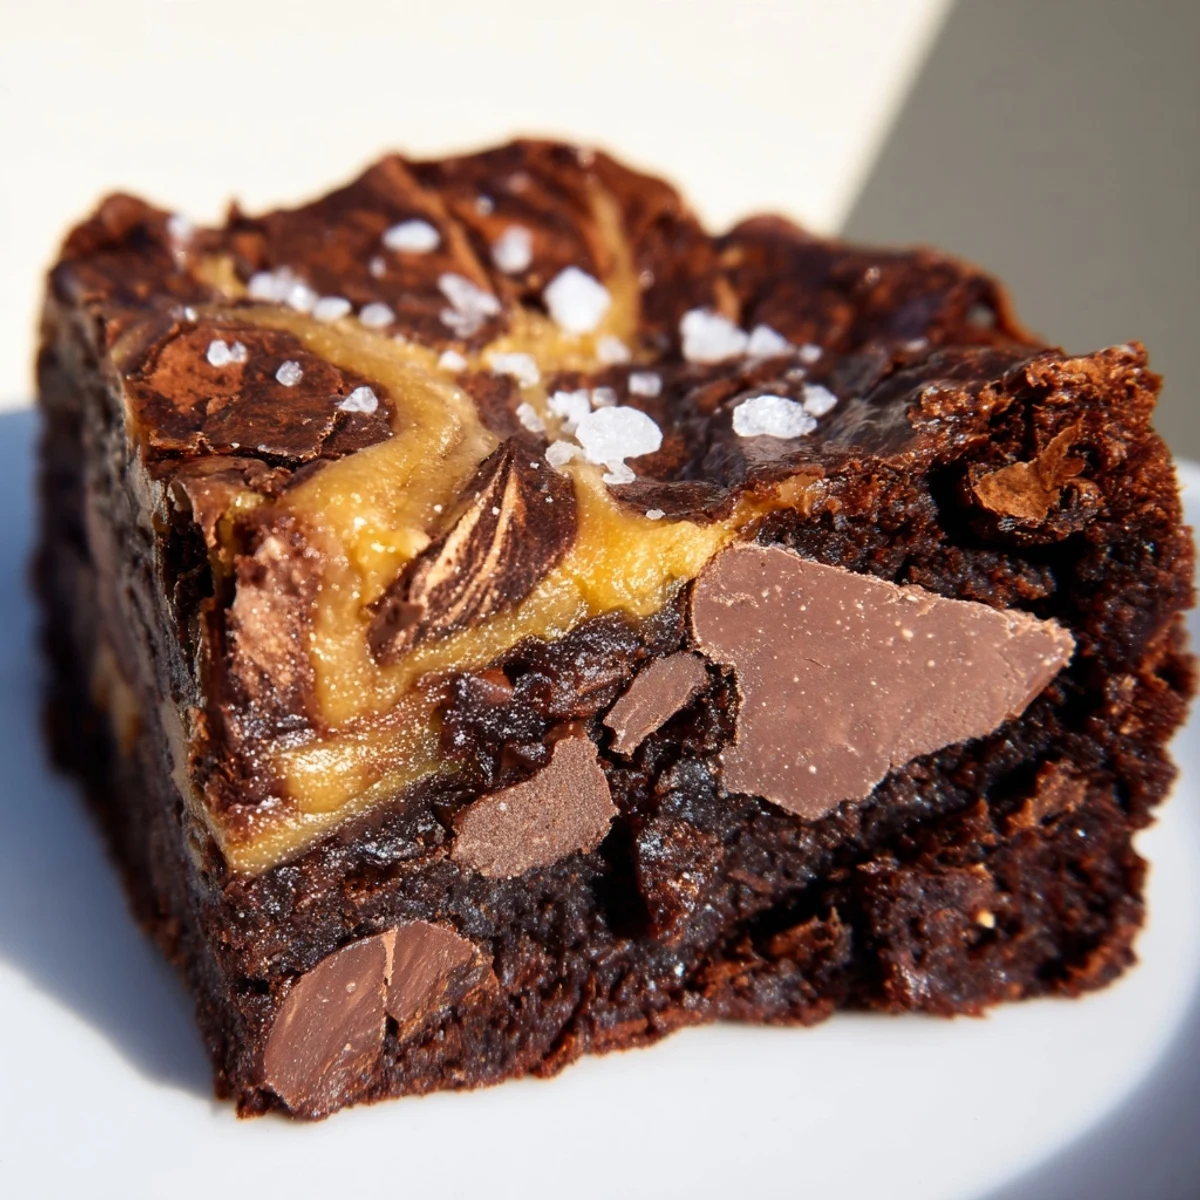 Save to Pinterest
 These brownies became part of my regular rotation because they're the kind of dessert that works for casual evenings and formal dinners alike. There's something timeless about chocolate and caramel together, something that just makes people pause and smile.
Recipe FAQs
- → How do I achieve the perfect fudgy texture?
-
Use the correct ratio of melted butter, sugars, and cocoa powder, and avoid overmixing once flour is added to maintain a moist and tender crumb.
- → What’s the best way to swirl the salted caramel?
-
Drizzle the cooled salted caramel over the batter and gently swirl using a knife or skewer to create a marbled effect without blending it fully.
- → Can I add nuts for extra texture?
-
Yes, folding in chopped toasted nuts or chocolate chips before baking adds a delightful crunch and enhances the flavor contrast.
- → How should I store the brownies?
-
Keep the brownies in an airtight container at room temperature for up to four days to preserve freshness and texture.
- → Is it better to serve warm or cooled?
-
They can be enjoyed slightly warm for a gooier texture or fully cooled for easier slicing and firmer bites.
